
In the age of fast-paced advancement of technology, the technology companies keep on improving their processor in a matter of some months after their last launch. There are several games or software that hit the market after the launch of a motherboard and for which there are several twists and changes that are necessary for the motherboard BIOS to make the system up and running. The motherboard manufacturers to support the higher-generation processor again needs to update their BIOS to make the processor compatible with the present motherboard. Updating the BIOS is very much important to keep the system smooth and right going in the long run.
Let us understand what are the ways we can update our motherboard BIOS. Basically, there are two ways by which we can update the BIOS.
- Using the USB stick: Here first you need to download the latest firmware of your BIOS from the motherboard manufacturers’ official website and load your USB stick with the same. Make sure you choose the right model and the right serial number before downloading the firmware.
- Using the Ethernet cable: Make sure you have a broadband connection with at least 1 MBPS bandwidth and an Ethernet cable to connect your computer with. This is the most simple and convenient method to update your BIOS but any connection error from your broadband provider in the middle of the process can result in serious error too.
Before we update the bios we need to enter the bios screen of the system. Generally, you can get access to the bios screen when you restart or power on your system. Simply Press “Del” when the motherboard manufacturer’s logo appears on the screen to enter the BIOS.
Let us proceed with the simple steps you need to follow to update your bios to the latest version after you enter the BIOS screen.
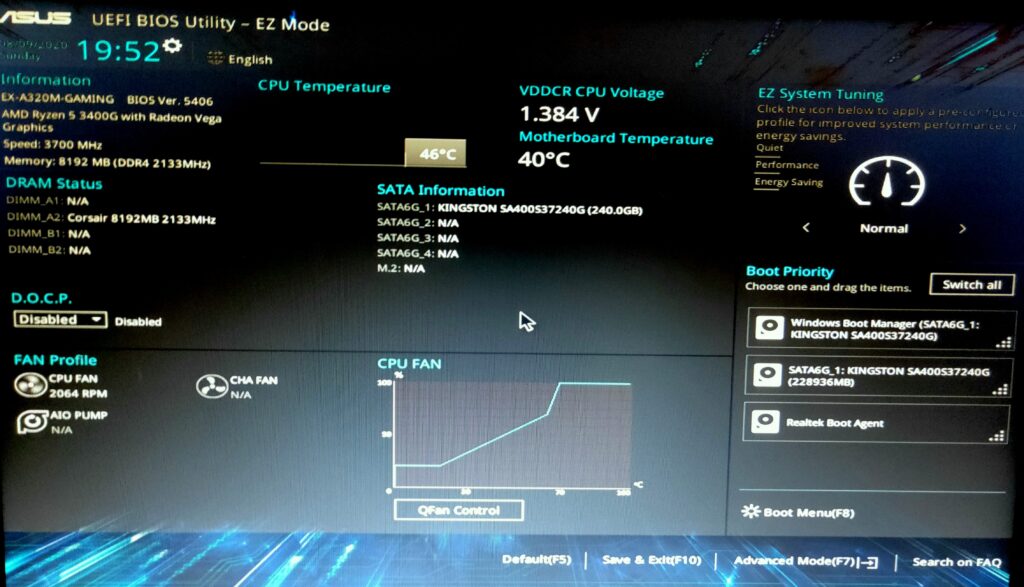
- First, the welcome screen of the BIOS will appear which has details regarding all the hardware and information related to them.
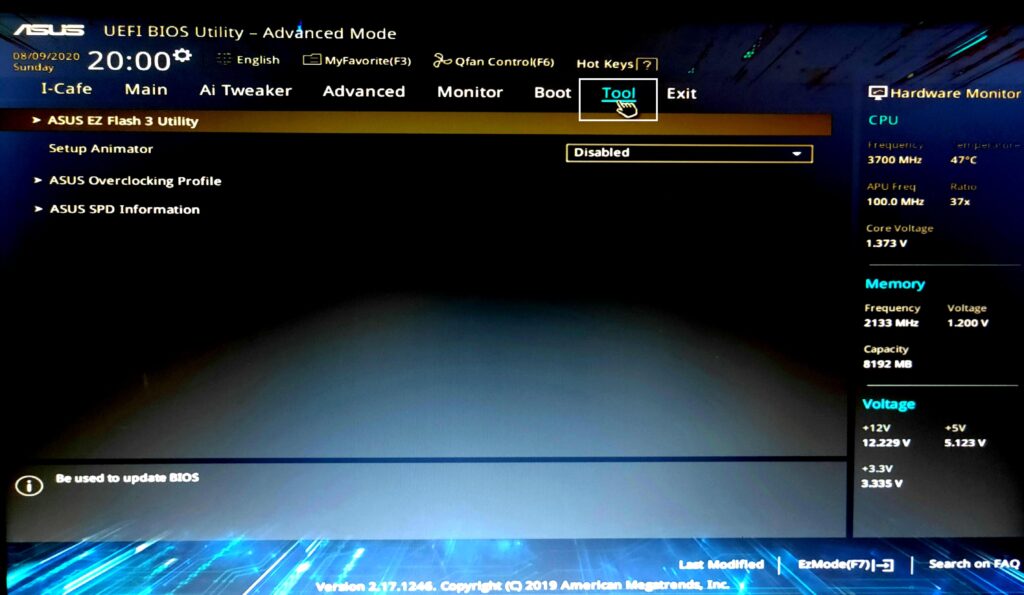
- Select the TOOL option on the welcome screen of the BIOS.
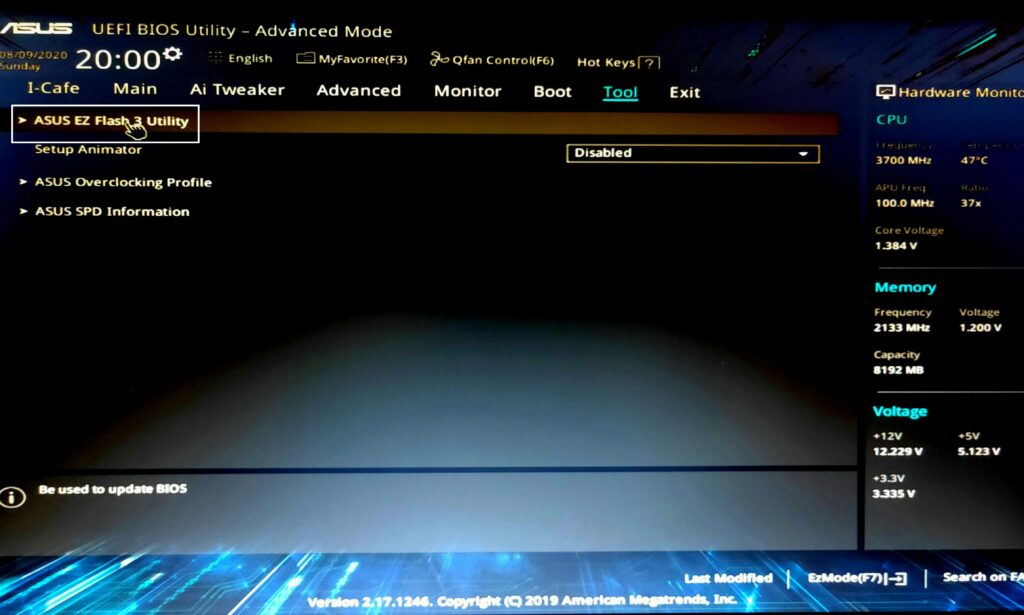
- Select the EZ Flash Utility from the screen.
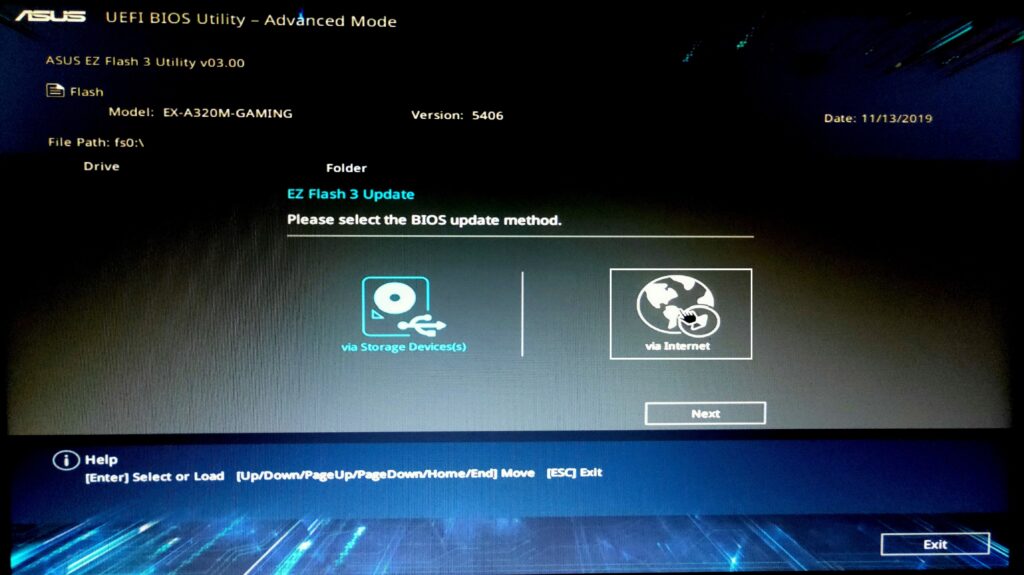
- Now you need to select the method by which you want the BIOS to get updated. If you have a proper internet connection, we would recommend you to select the via internet. But make sure you have a proper Ethernet connection. Else you can download the updated BIOS file from the manufacturer’s website and put it in the USB stick and select the via storage option. We will choose the Via internet method here.
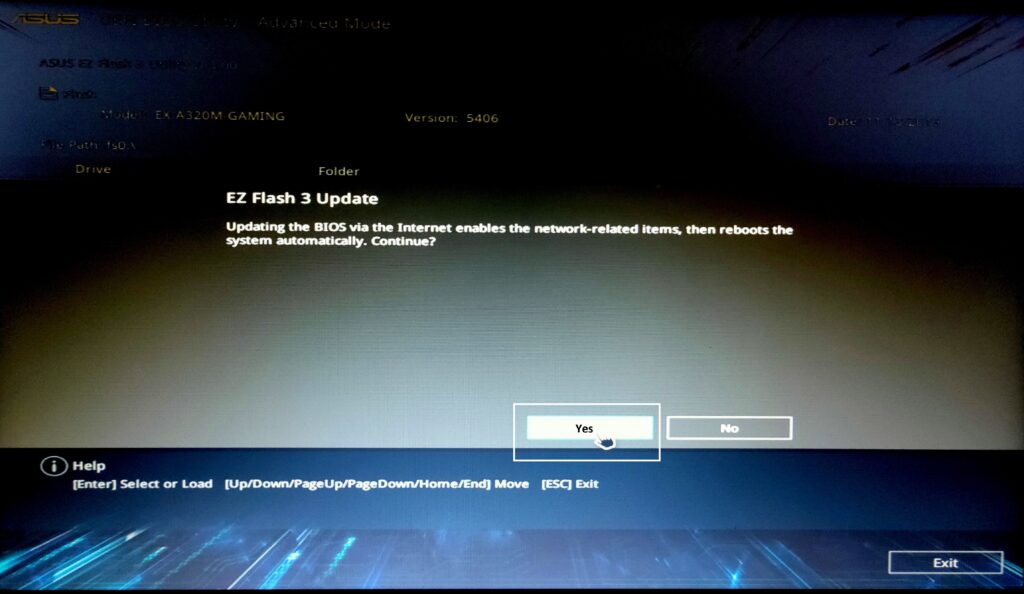
- Upon selecting the via internet method, the system will prompt us with a message that it will reboot itself while enabling the network-related items. we will select Yes.
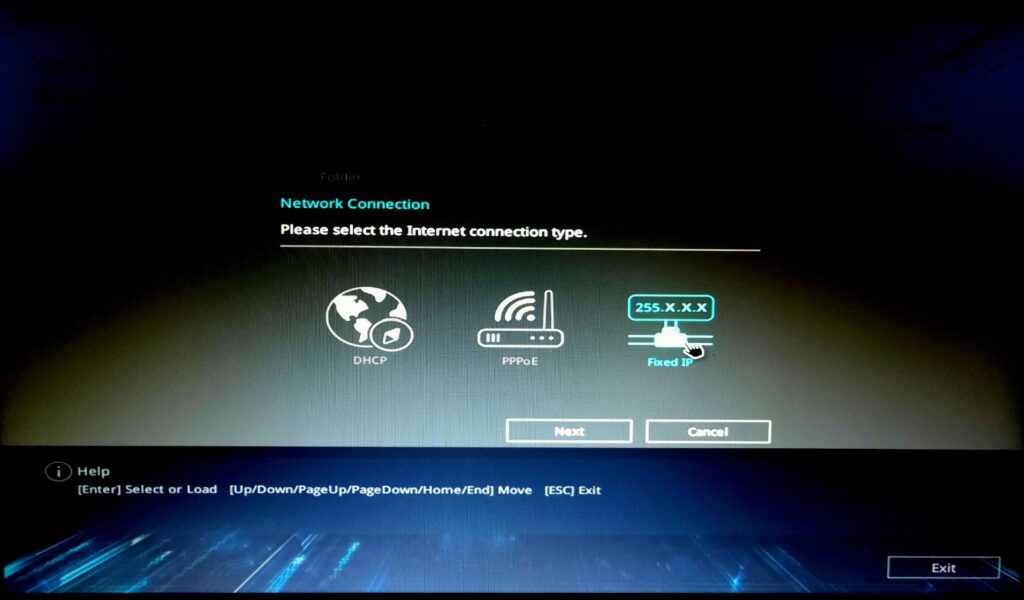
- The system will restart as prompted before. Now you need to select the type of internet connection you have. My connection was DHCP.
- Upon selecting the connection type, the system will check for the updated driver file on the internet and will prompt with the available file version.
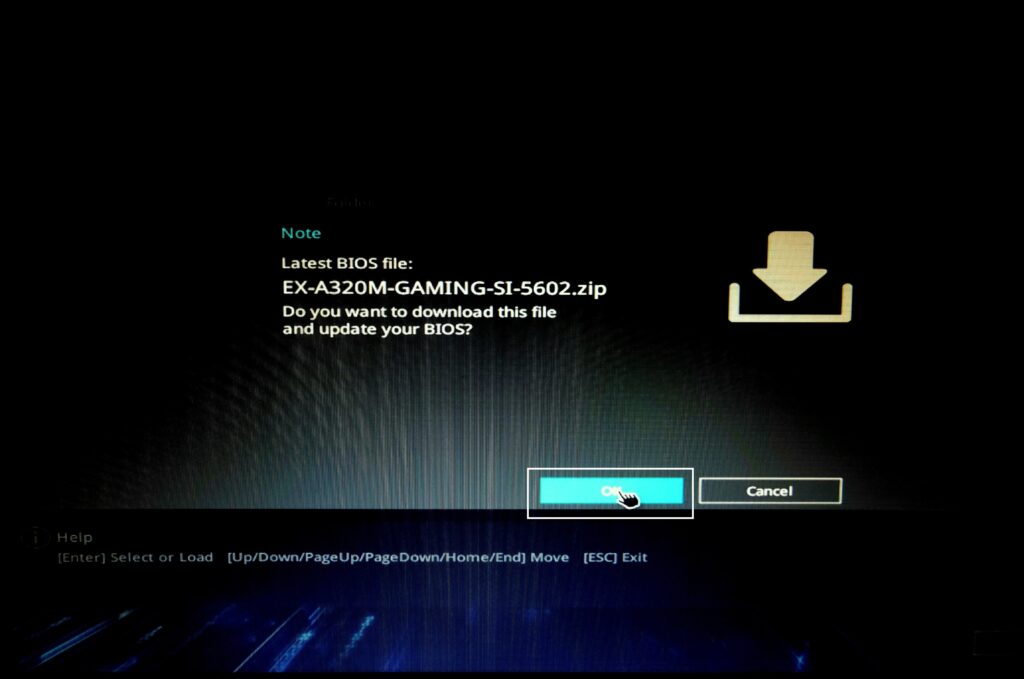
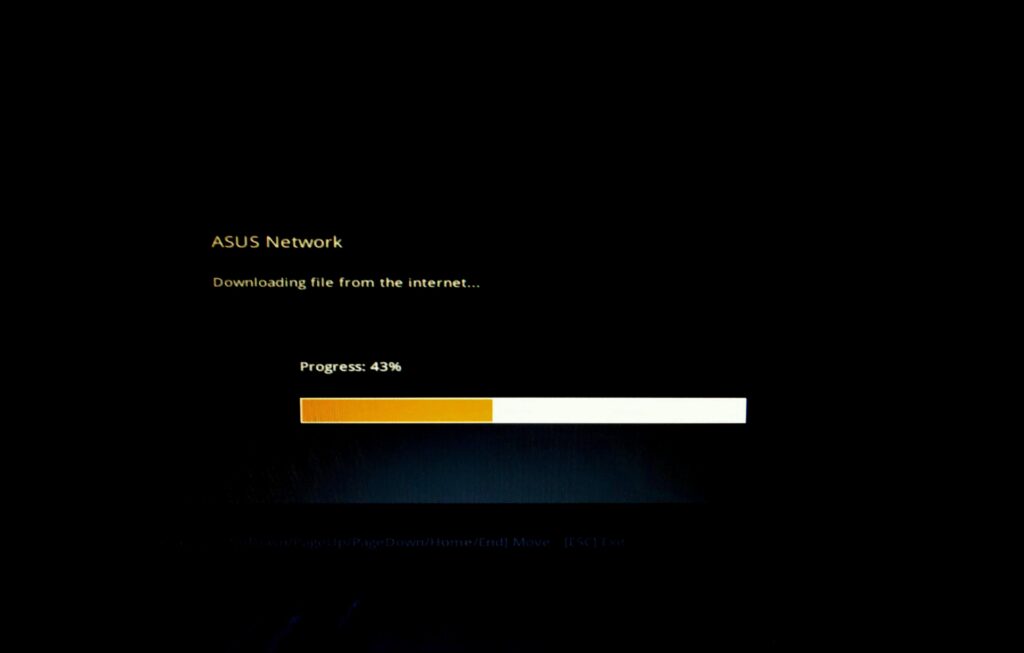
- After confirmation of the driver file, the system will start downloading the file from the server. Make sure the internet connection is stable during this period.
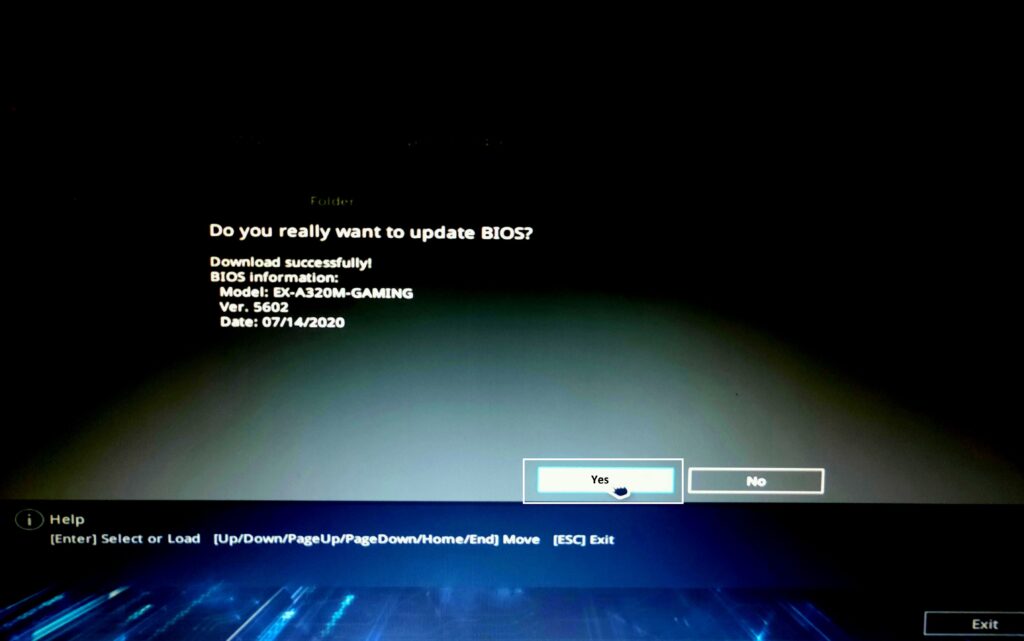
- Post the successful download of the file, the system will prompt whether you really want to proceed with the BIOS update. Select YES.
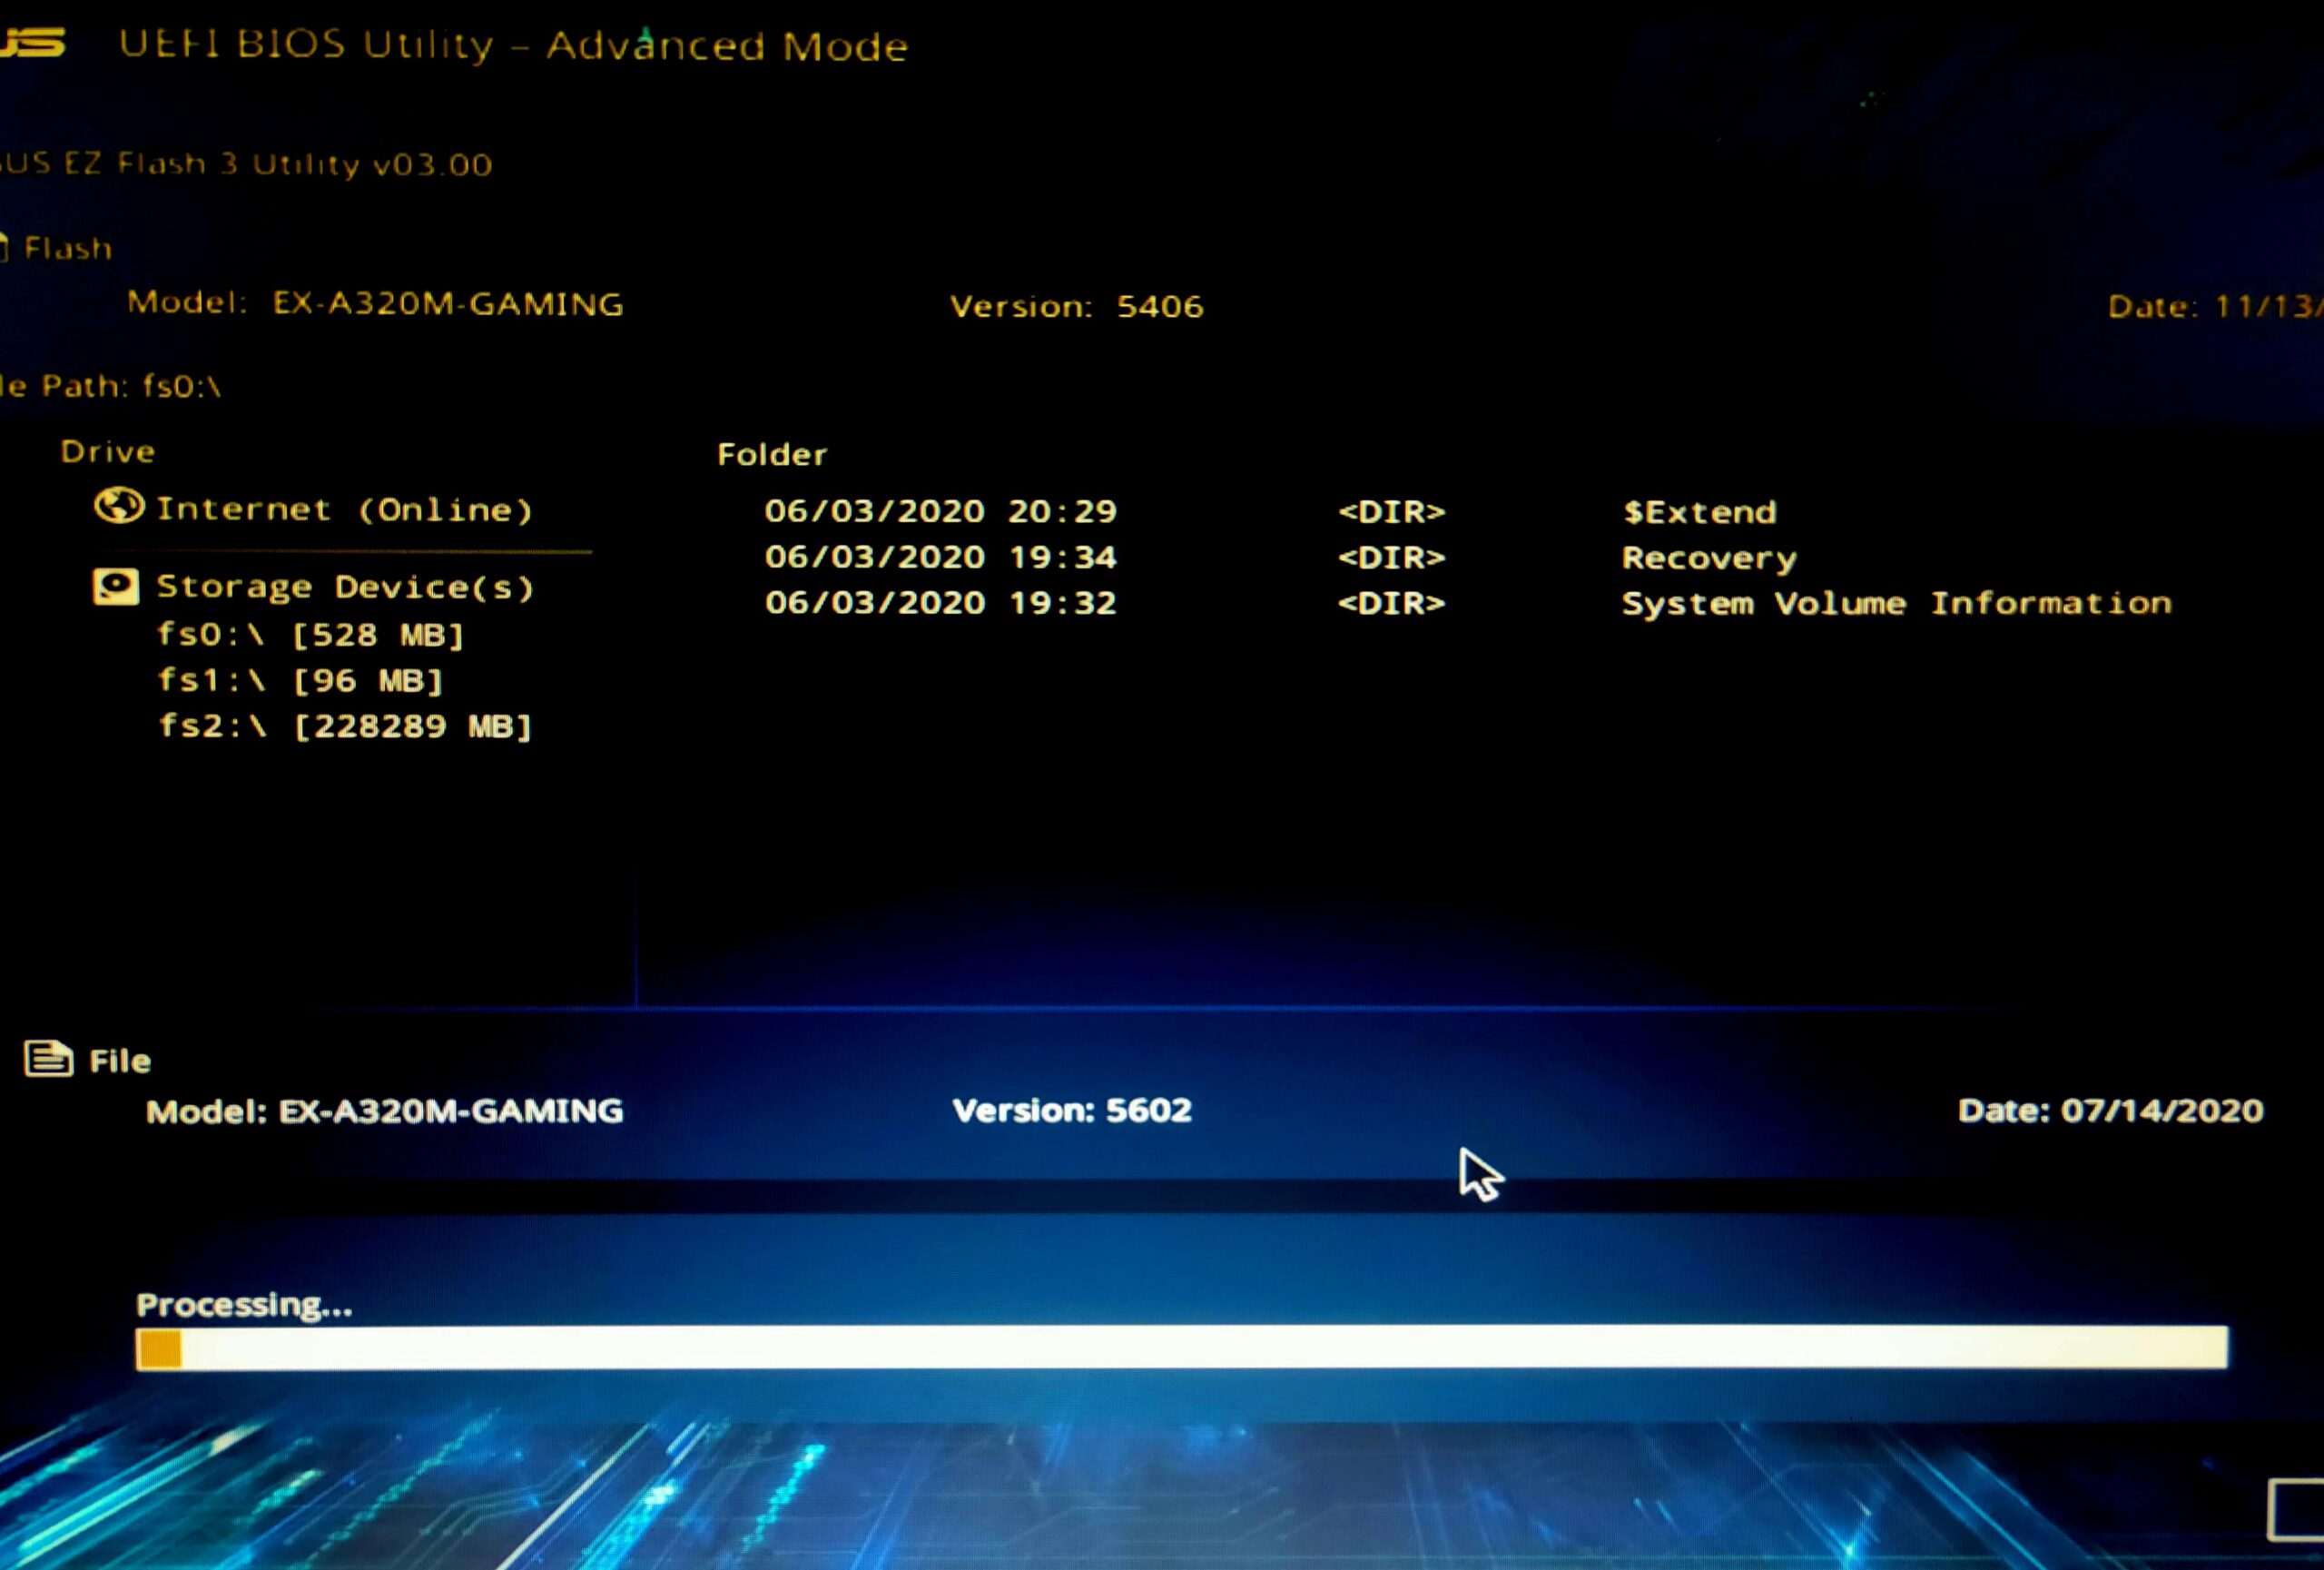
- Post the confirmation from your end, the system will start updating the BIOS and it will take about 5-7 minutes depending upon your configuration.
Congratulations! Finally, the BIOS is updated for your system. The system will prompt you with a successful message and will restart automatically.